Transform your space with charming ornament crafts! Use DIY photo ornaments to showcase cherished memories or handmade clay decorations for a touch of artisanal flair. Vintage-inspired paper crafts bring nostalgic charm, while nature-inspired ornaments like pinecone wreaths offer rustic elegance. Upcycle everyday items into unique decor, and create quilted patchwork or crocheted yarn ornaments for a cozy vibe. Festive pieces like rustic wood wreaths and personalized name tags add a special touch. Embrace these creative ideas to make any room warm and inviting. Discover a variety of ways to infuse charm into your home.
Table of Contents
ToggleDIY Photo Ornaments
Creating DIY photo ornaments is a fun way to personalize your holiday decorations. You can transform your favorite snapshots into creative photo displays that will add a personal touch to your tree. These ornaments aren’t just beautiful; they’re also sentimental gift ideas that will be cherished by your loved ones. Imagine the joy on a family member’s face when they receive a handmade ornament featuring a precious memory.
Start your personalized ornament projects by gathering photos that hold special meaning. Whether it’s a family vacation, a wedding, or your child’s first steps, these images make perfect subjects for your creations. Once you’ve selected your photos, print them out in a size that fits your chosen ornament style. You can use clear glass baubles, wooden slices, or even simple cardstock to create your base.
Next, affix the photos to the ornament bases using glue or double-sided tape. Add embellishments like glitter, ribbon, or tiny charms to enhance the look. These small touches turn your ornaments into family keepsakes that will be treasured for years to come.
You’ll love how these DIY photo ornaments make your holiday decor uniquely yours.
Handmade Clay Decorations
While DIY photo ornaments add a personal touch to your holiday decor, handmade clay decorations bring an artisanal charm that’s equally delightful. Creating your own clay decorations allows you to explore your artistic side and craft unique pieces that reflect your style.
Whether you’re into painted pottery or sculpted figurines, the possibilities are endless.
For a start, here are four types of handmade clay decorations you can try:
- Painted Pottery: Customize small pots or vases with intricate designs or simple color schemes. These pieces can add a pop of color to any corner of your home.
- Sculpted Figurines: Craft tiny animals, abstract shapes, or seasonal figures to display on shelves or mantels. These sculpted figurines bring character and charm to your space.
- Clay Jewelry: Create personalized jewelry pieces like pendants, earrings, or bracelets. Not only can you wear them, but they also make great gifts.
- Ceramic Sculptures: Experiment with larger, more detailed sculptures. These can serve as eye-catching centerpieces or conversation starters.
Vintage-Inspired Paper Crafts
You can bring a nostalgic touch to your space with handmade vintage paper ornaments. Using simple materials, you’ll create DIY decorations that evoke the charm of bygone eras.
Let’s explore some creative ideas to get started.
Handmade Vintage Paper Ornaments
Immerse yourself in the charm of yesteryears by crafting vintage paper ornaments that bring a touch of nostalgia to any space.
Start with vintage book page ornaments; they’re perfect for creating unique, textured decorations. Simply cut out shapes from old book pages and layer them to form intricate designs. Personalized paper tags add a special touch, making your creations even more meaningful. Write a loved one’s name or a heartfelt message to make each ornament truly one-of-a-kind.
For a more visually impactful project, try photo transfer decorations. Use photocopies of cherished pictures and transfer them onto paper using a gel medium. This technique gives your decorations an artistic, vintage vibe that’s sure to stand out. Additionally, clay photo keepsakes are another fantastic way to incorporate personal memories. Embed a small photo into a piece of air-dry clay, then shape it into a lovely ornament. Once it’s dry, add a ribbon for hanging.
Here are four quick steps to get started:
- Gather materials: Old books, photocopies, gel medium, air-dry clay.
- Cut and shape: Create your ornaments.
- Transfer photos: Use gel medium for photo transfers.
- Personalize: Add names or messages for that special touch.

DIY Nostalgic Paper Decorations
Frequently, DIY nostalgic paper decorations bring a warm, timeless appeal to your creative corners. By using materials like recycled magazines, you can craft vintage-inspired ornaments that not only look charming but are also eco-friendly.
One easy project is creating retro pop-up cards. These cards can add a delightful touch to any room, popping with colors and patterns reminiscent of bygone eras.
To start, gather some old magazines with vintage ads or illustrations. Carefully cut out the images and arrange them into layered scenes. Attach these scenes to cardstock using double-sided tape to create a 3D effect. You can also embellish the cards with lace, buttons, or ribbons for an added nostalgic touch.
Another fun idea is making paper garlands. Cut strips from recycled magazines and fold them into accordion shapes. String them together to form a whimsical garland that can be draped across a mantel or window. The varied textures and prints from the magazine pages will give your garland a unique, retro feel.
With a bit of creativity and some old magazines, you can easily transform your space with these charming, vintage-inspired paper crafts.
Nature-Inspired Ornaments
Drawing inspiration from the natural world, nature-inspired ornaments bring a touch of the outdoors into your home decor. They create a calming, organic ambiance that resonates with the beauty of the environment.
To get started, consider incorporating leafy garlands into your design. These garlands, made from faux or real leaves, can be draped over mantels or wrapped around stair railings to add a revitalizing, verdant touch.
Wooden acorns are another fantastic option. You can either purchase them pre-made or craft your own using small pieces of wood. These charming ornaments can be scattered on tables, placed in decorative bowls, or even hung from branches for a woodland-inspired look.
Here are four ideas to get you started with nature-inspired ornaments:
- Leafy Garlands: Drape them over furniture or wrap them around railings.
- Wooden Acorns: Scatter them on tables or use them in centerpieces.
- Pinecone Wreaths: Create a rustic wreath using collected pinecones.
- Twig Stars: Bind twigs together into star shapes and hang them on walls or windows.
Upcycled Material Creations
You can turn everyday items into beautiful decorations by using upcycled materials.
Try making bottle cap ornaments or creating unique pieces with fabric scraps.
These projects not only reduce waste but also add a personal touch to your decor.
Bottle Cap Ornaments
With just a handful of bottle caps, you can create unique and eco-friendly ornaments that add charm to any space. One fantastic idea is to make bottle cap wreaths. These aren’t only easy to assemble but also offer a unique ornament display for your walls or doors. You can paint the bottle caps in various colors or add small embellishments to make each wreath truly one-of-a-kind.
Another great project is turning bottle caps into magnets. These quirky fridge decor items can bring a splash of creativity to your kitchen. Simply glue small magnets to the backs of bottle caps and decorate the fronts with images, stickers, or paint.
Here are four steps to get you started:
- Gather Materials: Collect bottle caps, magnets, glue, paint, and any additional decorative items.
- Prepare the Caps: Clean and dry the bottle caps thoroughly.
- Decorate: Paint or embellish the bottle caps as you like.
- Assemble: Glue the magnets to the backs of the caps or arrange the caps for a wreath.
These bottle cap crafts aren’t just fun to make but also a great way to upcycle materials you already have.

Fabric Scrap Decorations
Transform leftover fabric scraps into charming decorations that add a cozy touch to any room. You don’t need to be an expert to create stunning pieces; just a bit of creativity will do.
One easy project is making quilted patchwork ornaments. Gather your fabric scraps, cut them into small squares or shapes, and sew them together into a beautiful patchwork. You can stuff them with cotton and add a loop for hanging. These colorful pieces can brighten up any corner or even serve as unique gifts.
Another fantastic idea involves crocheted yarn. If you have small pieces of fabric and some basic crochet skills, you can create lovely crocheted fabric yarn. Simply cut your fabric into long strips, tie them together, and crochet them into shapes like hearts, stars, or even small baskets. These upcycled creations not only look great but also help reduce waste.
Don’t forget that combining different textures and patterns can add depth to your decorations. Whether you’re using quilted patchwork or crocheted yarn, these fabric scrap decorations will make your home feel warm and inviting.
Festive Holiday Pieces
There’s nothing like crafting festive holiday pieces to add a touch of personalized cheer to your home. Embrace the season’s spirit by creating charming rustic wood crafts.
Start with holiday wreaths made from twigs, pinecones, and berries to adorn your front door. These natural elements not only evoke a cozy, rustic feel but also welcome guests with a warm, holiday greeting.
Next, consider making a festive garland to drape over your mantel or staircase. Use a mix of evergreens, cranberries, and handmade ornaments for a delightful display. You can even add twinkling fairy lights for an extra touch of magic.
Don’t forget about homemade stockings. Personalize them with felt, buttons, and embroidery to make each one unique. Hang them on the fireplace or along a stair rail to create a nostalgic holiday vibe.
Here’s a quick list of festive holiday crafts to get you started:
- Rustic wood crafts – Create holiday wreaths from natural materials.
- Festive garland – Combine evergreens and handmade ornaments.
- Homemade stockings – Personalize with felt and embroidery.
- Twinkling lights – Add to your garland for extra charm.
These simple crafts can transform any corner into a festive wonderland.
Personalized Name Tags
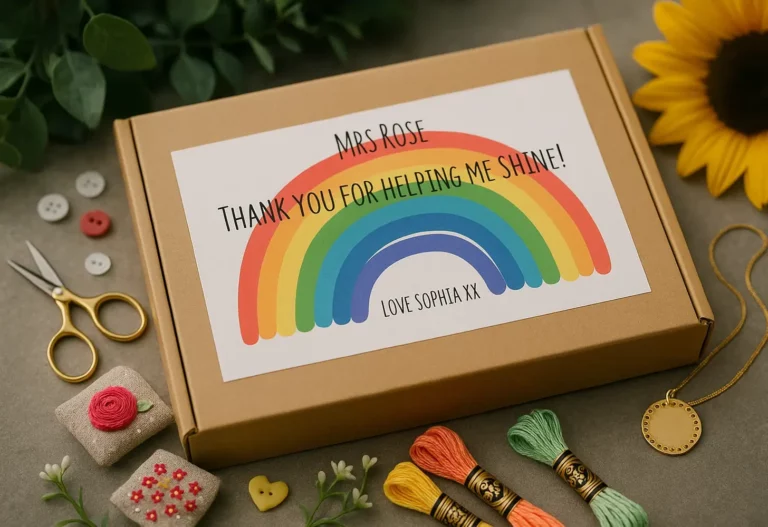
Personalized name tags add a unique touch to your holiday gifts and table settings. By crafting customized tags, you can infuse a personal flair that stands out and delights your guests. Think beyond the standard store-bought options and immerse yourself in creative designs that reflect your style and personality.
Start with handmade labels, which offer a range of unique styles. You can use materials like cardstock, fabric, or even wood slices to create your tags. Adding embellishments such as ribbons, buttons, or glitter can elevate your tags to a whole new level. Don’t forget to include the recipient’s name in a beautiful calligraphy or a fun, quirky font.
If you’re tech-savvy, consider using design software to create intricate patterns and print them out. Customized tags made this way can feature photos, seasonal motifs, or even inside jokes, making them truly one-of-a-kind.
For those who enjoy a hands-on approach, hand-painting or stamping designs onto your tags can be incredibly satisfying. The effort you put into these handmade labels won’t go unnoticed.
Personalized name tags don’t just identify gifts—they add charm and thoughtfulness to any occasion.


